OSRS Ironman P2P Guide

Unlike F2P (Free-to-play), P2P (Pay-to-play) has several skills that can be trained by players, along with a variety of equipment and unlocked quests. Instead of going through every possible training method for Ironman, we will be focusing on the most optimal way for such a player to max out. So, without further ado, let’s start!

Combat and Slayer

Starting off as an Ironman, you should initially focus on your melee stats by completing various quests that can save time. These quests include The Vampire Slayer, Waterfall Quest, Tree Gnome Village, Dragon Slayer, Fight Arena, and Witch’s House. Completing these quests should get your base stats high enough to equip Rune and Adamantite equipment.

Speaking in terms of Slayer, if you’re looking for efficiency, then you dedicate your entire melee training to this skill. It’ll not only provide you with equipment upgrades, but also help you earn OSRS Gold, and with time, you will max out in both; Combat and Slayer.

Range

You can choose to train Range side by side with the Slayer skill because it’s quite efficient to use this attack style while bossing or killing other NPCs. Once you’re around 70+ Ranged, you can switch to training the skill via the Chinchompas method in either MM1 or MM2 tunnels. If you’re going to hunt for Chinchompas instead of purchasing them to train your Ranged, then it’s good because it’ll also increase your Hunter level.

Magic

The early levels can be gained by using Fire Strike spells on Dragon or Hill Giants. You can collect bones from them and save up to train your Prayer alongside Magic. After that, it’s best that you switch to casting High-Level Alchemy, while you perform other skilled tasks like Agility. Once you reach a further stage, you can switch to using Ice Burst during your Slayer tasks, and make use of the Trident of the Seas staff for bossing.

Prayer

The early levels for Prayer can be gained by completing various quests in the early stages of the game. After that, you can save up bones Dragon Bones and Ensouled Heads while training other skills to train your Prayer later. However, make sure that you use these bones at your Player-Owner House Altar or the Ectofuntus because they offer a lot more experience there, rather than burying them.

Fletching

Ironmen normally agree that making Broad Arrows is the most efficient way to train Fletching all the way to 99. However, it is extremely slow at the very beginning as you start off by making Shafts and Headless Arrows, which only grants you low Fletching XP. With enough Runescape Gold made from other skills like Slayer or Combat, you can get a good experience rate by fletching better items. However, that is when you reach a good enough level in Fletching, before that mostly every skill is slow at the very start. You won’t find this skill in an osrs f2p ironman guide!

Fire Making

Obviously, you will have to start off with the early levels by burning logs (which is basically what the skill is about). But you will also be spending your time at Wintertodt minigame because it offers rewards that are quite useful for certain skills, such as seeds and fish. On your journey to 99 Fire Making, you will also achieve good levels in Woodcutting and Fletching.

Fishing

Since there are many paths that you can choose in Fishing, you want to skip the starting levels by completing quests like The Sea Slug Quest, and complete events from the NPC named Evil Bob (grants good Fishing experience). Normally, the best option would be to approach the Barbarian Fishing method to max out your Fishing, because you achieve good levels in Agility and Strength as well along the way. If you decide on cutting the fish, then you will also be getting a decent amount of experience in Cooking.

Cooking

Similar to fishing, there are many ways to start cooking depending upon at what stage you’re starting. If you have no supplies stocked, then you can purchase and cook them from the Culinaromancer’s Chest, or Rufus’ Meat Store in Canifis. The grind goes faster once you unlock Wines, and once you are about 65 Cooking, it’s best that you switch towards the Hosidius Mess Hall and make Pineapple Pizzas. However, you will require 45% Hosidius favour, which is quite easy to get.

Crafting

The first few levels for this osrs ironman crafting guide can be covered by questing, making bowstrings, or creating pieces of jewelry. When you unlock the Molten Glass stage, the majority of your grind will lie upon it. There’s a decent meta to obtain Buckets of Sand, which is by mining Sandstone and grinding the stones at the Sandstorm Grinder. You can also purchase them from the Charter Ship or gather them yourself from Yanille. Speaking of Seaweed, there is no method that is in comparison against the Giant Seaweed that can be obtained from the underwater farming patches located on Fossil Island. Alternatively, you can purchase regular ones from the Charter Ship too.

Mining
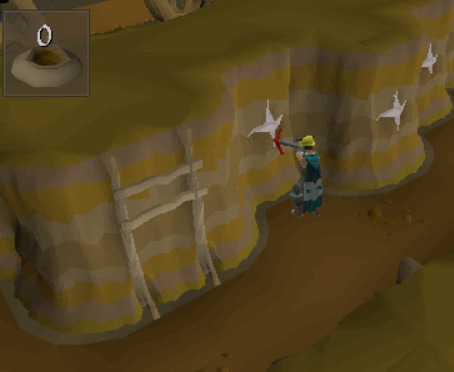
Similar to some of the other skills, you can skip the first few levels by questing, and then start to power mine Iron Ores until you unlock the high-tier ores. Your best choice would most likely be the Rune Pickaxe, and you can purchase it from multiple stores, or obtain it in the form of a drop from monsters across OSRS.

You can also get a good amount of Mining experience if you choose the option to head to the Sandstorm route to obtain sand for the crafting skill. Other than that, there’s always the Motherlode Mine, which is the most relaxing and profitable way to max out Mining.

Smithing

You can passively train Smithing with this osrs ironman smithing guide with the help of the ores that you obtain while training Mining, or you can start collecting the ores that you get in the form of a drop from various creatures around the game. You can also choose to convert your Steel Bars into Cannonballs with the help of a mold to help with your Slayer grind.

If you’re rich enough and have a good pile of cash, then you can buy your way to the very end at the Blast Furnace. Buying Gold Ore and smithing them is the fastest way to train this skill, but only if you have Goldsmith Gauntlets. Alternatively, you can smelt other metals and smith them into items, which also provides a good experience rate per hour.

Agility

To skip the slow low-level training, you can achieve a few Agility levels by completing the Tourist Trap quest. As mentioned in the Fishing section, you can efficiently train your Agility too to gain a good enough level that can allow you to visit better courses. Once you have the required level, you can switch to the best available rooftop course, and at the same time, train your Magic (High-Alchemy) or Fletching (Arrows in between steps).

Thieving

Thieving isn’t a semi-AFK skill because it requires repetitive clicking. You can start training at any point of your Ironman journey. Start off with pickpocketing Men, Cake Stalls, Warrior Women, and then Master Farmers, until you reach level 45. After that, you can switch to Blackjacking bandits till 99.

Herblore

It’s considered as the slowest skill to achieve 99 because there is a lot of material that you can obtain. Herb Sack can be quite useful as you train your Slayer because you can store your drops in it. Other than that, the majority of items can be obtained from Farming.

Farming

Farming can passively be trained as you train your Slayer because you will get a lot of seeds from monster drops, which you can collect and grow later. You can also get seeds from bird nests through the Birdhouse game. Do remember to regularly grow Limpwurt Roots, Snape Grass, Berries and Herbs to obtain materials for Herblore.

Hunter

Hunter is slow at first, but there’s a solution to it in this osrs ironman guide. You can complete the Varrock Musem minigame which will give you a kick start of 9 levels (from level 3). From that point onwards, you can do Birdhouses until you reach the point where you can hunt Chinchompas. If you stick to hunting them till 99, then you’ll have enough Chinchompas to get your Ranged maxed out.

Rune Crafting

Rune Crafting can get annoying before the back and forth runs. That’s why you can cut off the first few levels by completing Eyes of Glouphrie and Lunar Diplomacy, as per this osrs ironman guide. You can also make use of experience lamps. Once you have the access to Lunar Spells and the Ourania Altar, you can stick to it and grind till your max out. Alternatively, you can craft Nature Runes at the Abyss.

Construction
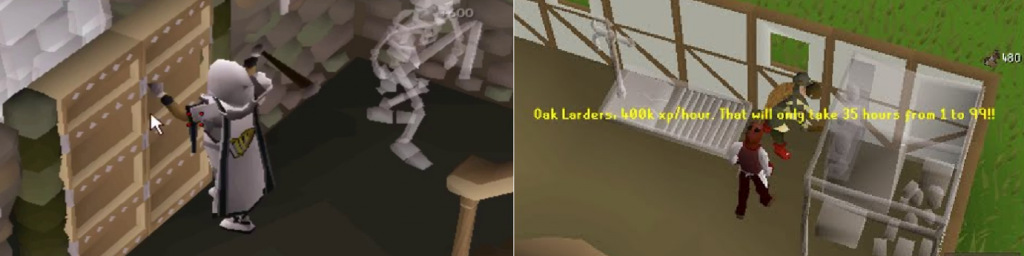
Since this skill requires money, you can slowly progress it as you train your Slayer and Thieving. You can pick regular Planks at the Barbarian Outpost and build Chairs or Shelves, which is a cheap way to get started with Construction. The best method would be by cutting Oak Logs and having your house Butler run to the sawmill, which will save a lot of time on your hands. Once you have the planks, you can make Oak Dungeon Doors and Oak Larders.

Diablo 2 Resurrected Act Bosses

Every MMORPG needs a good climax, which is given to players in the form of bosses. These bosses are added into the game to test out the player’s ability after the hardships they’ve been through to reach the end-game content. You can call them a superior form of the creatures or monsters that you face along the path, for D2R Bosses.

Similarly, Diablo 2 also offers an entertaining experience for players. Once the main storyline is completed, the entire game revolves around killing end-game D2R Bosses for extraordinary loots. Today, we are going to talk about such dreadful beasts that are encountered at the end of every act.

Act 1 Boss: Andariel

Andariel is located on the fourth floor of the Catacombs. She’s one of the lesser evils that reside in the world of Diablo, and she’s also known to be the twin sister of Duriel for diablo 2 act bosses. You encounter her at the end of act 1, and in terms of difficulty, she’s a menace because of her poison attacks and the dark arena that surrounds her.

She’s terrifying and can drain a player’s rejuvenation potion, even though they’re used to fighting dreadful bosses. It’s because Andariel specializes in poison damage, and the best tactic to counter her attacks is to bring a ton of healing potions rather than antidotes for diablo 2 act bosses.

Act 2 Boss: Duriel

Duriel is located in the Tombs of Tal Rasha. He’s also counted towards one of the lesser evils in the game, but that doesn’t mean he’s easy to defeat for diablo 2 bosses. Also known as the Maggot King, he’s considered to be one of the toughest bosses out there. Many have failed to approach him head-on.
Duriel’s arena is quite small and he occupies most of the space, making it pretty difficult to fight against him. He can also freeze the enemy with an innate aura so that they don’t move around in the cramped space.

Act 3 Boss: Mephisto

Mephisto is located on the third floor of the Durance of Hate. He isn’t that difficult to face in lower difficulties or the first campaign runs, but as you progress further, he becomes a pain that has no cure. Being the final boss in act 3, he’s quite frightening, which you can also blame because of his tactics and appearance for diablo 2 bosses.

He can easily clear a bunch of players with his cold, poison, and lightning attacks. Ranged players would have difficulty facing this beast or at least his greater version, as his skull projectiles can result in swift death. Some of the players approach him with multiple gears so that they can switch in mid-battle, which is a good strategy.

Act 4 Boss: Diablo

Diablo is located in the Chaos Sanctuary. He’s the most troublesome boss of the Diablo 2 series, and he’s quite different from the first game as he was just in his revived version. The vessel is the warrior from the first Diablo game, and that’s primarily why the three original classes are still reunited in the second one.

In your first encounter, you’ll notice that Diablo is ridiculously difficult to deal with. He can drive players to their graves with one shot from his notorious lightning attacks. However, the game runes on different difficulty levels, so as you progress, you’ll obtain better equipment that can be very helpful.

Act 5 Boss: Baal

Baal is located in the Throne of Destruction. Even though his siblings have proven to be more difficult than him, he’s the one who was the actual threat to the Barbarian lands. When he waged a war, he was quite close to conquering Mount Arreat and taking the World Stone.

The first battle can be tough, and especially for players who reply entirely on melee combat. Despite that, many different builds and classes have defeated him with a reliable setup. Also, he’s not as terrifying as his siblings in terms of appearance and size.

WoW TBC Leatherworking Guide

Since the release of Vanilla, Leatherworking has been one of the best ways for players to outfit themselves with leather equipment. To train in this profession, you will have to gather materials like Scales, Beast Pelts, Leather, Hides, and Dragonkin. It’s a known fact that Leatherworkers are able to craft some of the best and most powerful gear in the game. Thanks to TBC, Blizzard has added a variety of BOP & BOE drop recipes, as well as expanded the profession’s range through specs. Even though specs are not a new addition, within The Burning Crusade, you can make powerful gear pieces, such as Ebon Netherscale Bracers, Primalstrike Vest, and Windhawk Belt. Also, without any specs, Leatherworks can make items like Living Earth Shoulders and Carapace of Sun & Shadow, which are known to be highly beneficial in Warcraft and in this wow TBC leatherworking guide.

The only material-gathering profession for Leatherworkers is Skinning in this wow TBC leatherworking guide, and that’s the primary reason why the players opt to pair both these professions. The leatherworking profession is suitable for almost every Leather & Mail wearer class, but that’s not the case for Hunters because the stats that are available on the crafted equipment must be carefully evaluated by the Hunter – whether choosing the Leatherworking profession is right for them or not in this TBC lw guide.

Trainers

Since the 2.3 Patch, Blizzard has reformed Leatherworking into a profession that can be learned from trainers in any major capital city. So, where you want to train is entirely up to you. However, once you cross the Dark Portal, you will have to find a trainer, respective of your faction, which is the first questing area. For the Alliance Faction, you have to locate Brumman at the Honor Hold, and the Horde Faction players should head out to locate Barim Splithoof at Thrallmar in this TBC lw guide.

Moving on, if we talk about specializations – To learn Dragonscale Leatherworking, Alliance Faction players need to locate Peter Galen in Azshara (between The Forlorn Ridge and The Ruins of Eldarath), and the Horde Faction Players need to locate Thorkaf Dragoneye in Badlands (West of Lethlor Ravine). To learn Elemental Leatherworking, Alliance Faction players need to locate Sarah Tanner at the Tanner Camp (Southwest of Searing Gorge), and the Horde Faction players need to locate Brumn Winterhoof (North of Stormgarde Keep). To learn Tribal Leatherworking, Alliance players need to locate Caryssia Moonhuter on the Edge of Thousand Needles, and Horde players need to locate Se’Jib in the Ruins of Stranglethorn Vale (South of Grom’gol).

Approximate Materials Required

Vanilla: 275x Light Leather, 20x Light Hide, 75x Salt, 110x Coarse Thread, 25x Medium Hide, 100x Fine Thread, 25x Gray Dye, 10x Heavy Hide, 410x Heavy Leather, 75x Black Dye, 160x Silken Thread, 20x Bolt of Silk Cloth, 10x Iron Buckle, 565x Thick Leather, and 400x Rugged Leather.

TBC: 50x Knothide Leather Scraps, 820x Knothide Leather, 45x – 95x Fel Scales, 100x – 150x Heavy Knothide Leather, 30x Primal Mana, 200x – 262x Thick Clefthoof Leather, 40x Primal Earth, 40x Cobra Scales, 80x Primal Air, 10x Primal Nether, 30x Fel Hide, 15x Primal Fire, and 15x Primal Water.

For both Vanilla and TBC, you will need 165 to 215 Rune Threads (Approximately).

Levels 1 to 300

Make sure that you visit the trainer at levels 55, 150, 225, and 300 to become Journeyman Leatherworker, Expert Leatherworker, Artisan Leatherworker, and Master Leatherworker, respectively.

Start off with converting Light Leather into Light Armor Kit till level 35, Light Hide with Salt into Cured Light Hide till level 55, Light Leather and Coarse Thread into Embossed Leather Gloves till level 85, Light Leather and Coarse Thread into Fine Leather Belt till level 100, Medium Hide with Salt into Cured Medium Hide till level 120, Light Leather and Coarse Thread into Fine Leather Belt till level 125, Fine Leather Belt, Cured Medium Hide, Fine Thread, and Gray Dye into Dark Leather Belt till level 150, Heavy Hide with Salt into Cured Heavy Hide till level 160, Heavy Leather and Fine Thread into Heavy Armor Kit till level 170. Now, before you continue, you have to acquire the Pattern called Dusty Leather Leggings, which is a common world drop. However, if you can’t loot one for yourself, then purchase it from the Auction House at a fairly affordable price.

Combine Heavy Leather, Fine Thread, and Black Dye to make Dusty Leather Leggings till level 180, Heavy Leather, Cured Heavy Hide, and Fine Thread into Barbaric Shoulders till level 190, Heavy Leather, Fine Thread, and Black Dye into Dusty Bracers till level 195, Heavy Leather, Black Dye, Bolt of Silk Cloth, and Iron Buckle into Dusty Belt till level 205, Thick Leather and Silken Thread into Nightscape Headband till level 230, Thick Leather and Silken Thread into Nightscape Pants till level 250, Thick Leather and Silken Thread into Nightscape Boots till level 260. Before you continue ahead, you will need to purchase the Pattern called Wicked Leather Gauntlets – Alliance players will have to travel to the Wester Plague Lands and locate Leonard Porter (South of the Ruins of Andorhal), and the Horde players can purchase it from Werg Thickblade in Trisfal Glades (Outside the Western Plague Lands Border).

While you’re taking a pause to purchase the pattern from your respective faction vendors, it’s also a good opportunity to farm or purchase the Wicked Leather Bracers and Wicked Leather Headband Pattern, as you will need them for the further levels.

Anyhow, let’s continue. Start by combining Rugged Leather, Rune Thread, and Black Dye to make Wicked Leather Gauntlets till level 270, Rugged Leather, Rune Thread, and Black Dye into Wicked Leather Bracers till level 280, and then Rugged Leather, Rune Thread, and Black Dye into Wicked Leather Headband till level 300.

Levels 300 to 375 (TBC Leatherworking)

From levels 300 to 310, start combining Knothide Leather Scarps to make Knothide Leather, and then use Knothide Leather to make Knithide Armor Kit till level 325. Now, before continuing ahead, head to the vendor named Cro Threadstrong in the Lower City (Shattrath) to purchase the Pattern called Heavy Knothide Leather. Alternatively, Horde players can travel to the Silvermoon City and locate Zaralda, while Alliance players can head to Azuremyst Isle to speak with Harefet. After that, start converting Knithide Leather into Heavy Knothide Leather till level 335, Knothide Leather and Rune Thread into Thick Draenic Vest till level 340, and Knothide Leather, Felscales, and Rune Thread into Felscale Breastplate till level 350.

The only way possible to move forward from level 350 to 375 is by earning recipes through Faction Reputation Rewards. Even though the path has a lesser material requirement, you still need to be of Honored Reputation rank with Scryers, Friendly with Cenarion, and Exalted with the Hellfire Peninsula faction. You can alternatively go with Aldor and Sha’tar, instead of Scryers and Hellfire Peninsula, but the reputation rank requirement will still remain the same.

For the final few levels, you can make Scryers Enchanted Felscale Gloves (Heavy Knothide Leather, Felscales, and Primal Mana), or Aldor Blastguard Belt (Heavy Knothide Leather, Fel Hide, Primal Fire, and Primal Water) till level 355. Heavy Clefthoof Boots (Cenarion Expedition), requiring Heavy Knothide Leather, Thick Clefthoof Leather, Primal Earth, and Rune Thread, till level 365. Lastly, till you reach level 375, you can make Nethercobra Leg Armor (Hellfire Peninsula), requiring Heavy Knothide Leather, Cobra Scales, Primal Air, and Primal Nether, or Drums of Battle (Sha’tar), requiring Heavy Knothide Leather and Thick Clefthoof Leather.

OSRS 1 to 99 Ranged Guide

Ranged is a vital skill to train in OSRS. It ranges from safe-spotting high-level beasts to taking down Player Killers in PVP. That’s primarily why it’s important to keep up with the best Ranged training methods in the game. Worry not! We’ve prepared a detailed guide for both F2P and P2P players.

Why train it?

There are three combat skills that you can choose from in OSRS. Among them, ranged is the safest option. However, the grind to maxing out is tedious. Besides that, you can earn a lot of OSRS Gold from it by killing monsters without actually facing them head-on. So, let’s begin with the guide!

Ranged styles

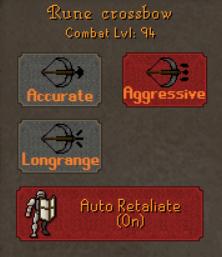
There are three Ranged attack styles you should be familiar with. The first is Accurate which offers a +3 unwritten accuracy bonus. Then there’s Rapid which offers a better fire rate, but at the cost of your accuracy. Finally, there’s Long Range which increases the distance at which you can attack your foe, alongside a +3 unwritten defense bonus.

Level 1 to 20

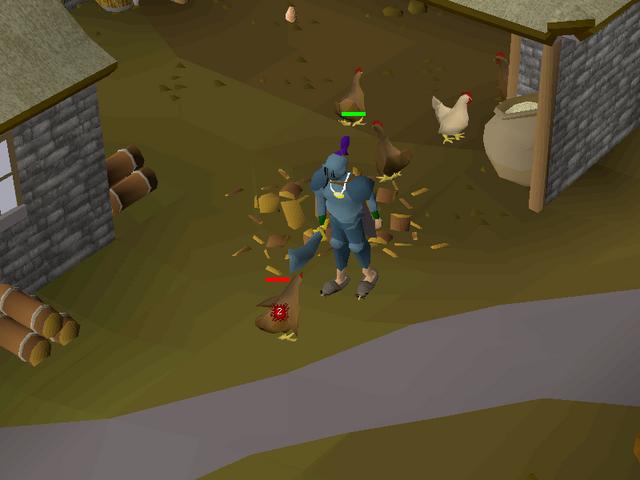
The early levels start by attacking Chickens at the coop in Lumbridge. Once you’re at level 10, you can switch to Cows. These levels fly by quickly, and you can always bank your drops to train the other skills. Cow Hide for Crafting and Chicken Feathers for Fishing.

Level 20+

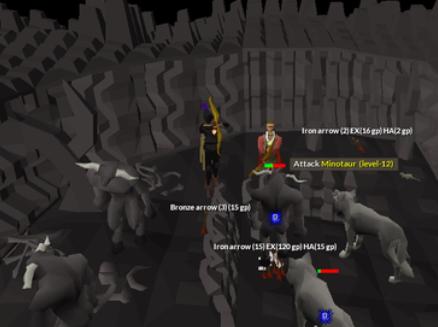
From level 20 onwards, you can purchase good OSRS gear, grab a couple of food supplies, and then head towards the Stronghold Security to kill Minotaur. You might have to look for a safe spot if you’re at a low combat level.

Level 40+

At level 40, you can switch to Moss or Hill Giants as they offer better loots. If you’re a member, you can consider approaching Rock Crabs for better XP rates. If you don’t want to hop, you can stay at Giants all the way till level 80 Ranged.

Level 50+

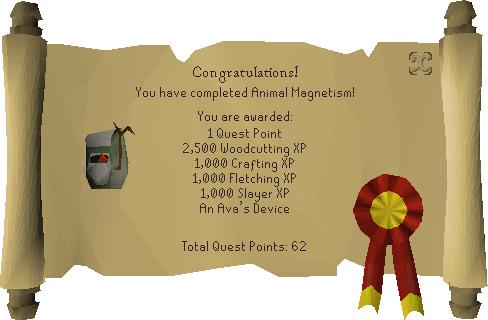
If you’re a P2P player, it’s best that you complete the Animal Magnetism quest as the granted cape boosts your Ranged and recovers ammo for you. F2P players can continue with Giants till level 60 before switching.

Level 60 to 80

At level 60, purchase a Rune Crossbow (requirement: level 61). It’s the most-preferred weapon until level 85. If you’re looking for better loot, then switch to Lesser Demons in Karamja island, or alternatively, you can kill the Demons trapped in the Wizard’s Tower.

Level 85 to 99

To cover the rest of the levels, head back to the Stronghold to kill Ankous. They offer the best XP and loot in F2P. You’ll likely stay here until you max out, so get comfortable!

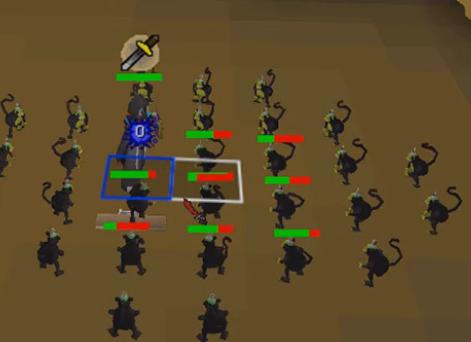
If you’re a member, you can consider heading towards the Ape Atoll Dungeon to kill Maniacal Monkeys for far better XP rates. However, you’ll have to invest a good amount in Red Chins, as well as complete the Monkey Madness 2 quest.

Alternate Method (P2P Only)

Level 1 to 32

Cover the early levels by completing quests like Horror from the Deep, Death to Dorgeshuun, and Shadow of the Storm. Doing so will get you straight to level 32 without any real training.

Level 33 to 55 or 70

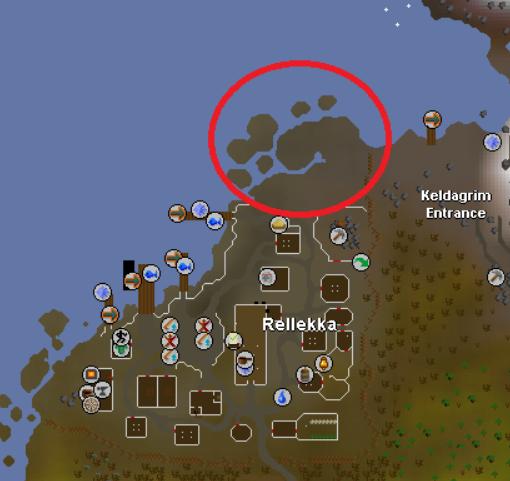
From here on out, you’ll be killing Rock Crabs in Rellekka. For the best XP rates, make sure you use the best available Darts, Dorgeshuun Crossbow (level 28), best available Throwing Knives, or Rune Crossbow (level 61) with Broad Bolts as you progress.

Level 45+

The fastest way to level your Ranged is by throwing Chins at Maniacal Monkeys in Ape Atoll Dungeon. Make sure you wear equipment to boost your Ranged.

If you’re bored, you can switch to Dagonnoths located under the Lighthouse. Use a Toxic Blowpipe with a Dwarf Cannon set up to get around 175k XP per hour.

You can also use a Toxic Blowpipe with Steel/Mithril Darts to train at the Nightmare Zone. Make sure you’re using the Prayer Sharp Eye actively and have a Necklace of Anguish equipped to get about 110k XP per hour.

Conclusion

The journey can be tiresome with a lot of running back and forth, but it’s worth noting that Ranged is very important for end-game content. So, make sure you train with dedication and get the help you need from our guide. Good luck!

1-1.5M Per Hour Runescape

This guide is a well thought guide, and i realised this method while i was in need of a Summer Pie.
Anyways, let’s get to the point.

-+Table of contents+-
1.Steps
2.Requirements
3.Avoiding the wait
4.Calucations
5.Profit
6.Tips
-+Table of contents+-


-+Steps+-

1.Buy around 500 – 1000 Pastry Dough. This should be costing you 400 – 520k.

2.Buy Pie Dishes. This should cost you around 600 – 500k depending on the price you put in.

3.Create another tab in your bank just to speed the procedure a little bit, and to make things less confusing.

4.Withdraw 14 Pie Dishes and 14 Pastry Dough’s from your bank.

5.Use the Pie Dish on the Dough (Or the Dough on the dish, dosen’t matter.)

6.Create some Pie Shells, a interface should pop in telling you how much you want to make (Sort of like cooking).

7.Choose all, and watch it make some Shells.

8.You’ll see them turning into Shells, when they’re all done, bank, and repeat the process.


-+Requirements+-

1.This is what is so speical about this guide, they are NO Membership requirements! Litteraly nothing, Its F2P, P2P, Anything!. So awesome.
2.Some sort of money. You don’t have to be a millionare to stay raking in some cash, you can do this guide with around 200 – 800k to starting some profits.


-+Avoiding Waiting+-

1.As you know, Pie Dishes are not that hard to buy, but i know alot of you don’t have patience so, here’s another method.
2.Buy some other cheap pies. (I.e Meat Pie, Apple Pie – Apple is not recommended, ) – At any cirumstances do not buy a pie that dosen’t makes you profit. It dosen’t worth it.
3.BONUS – You should pie HALF PIES. This is the price cut in half but they dont sell that quickly. So it’s not that good.


-+Calucations+-

1.As of 11 July, 2010, Pie Dishes Are – 103GP, – Pastery Doughs Are – 426GP – And Pie Shells Are – 1,085GP.

  1. 103 + 426 = 526 To produce a Pie Shell. 1,085 – 526 = 559 – That’s 559GP Profit PER SHELL. Amazing.

-+Profit+-
1.As stated above, as of 11 July, 2010, The current profit is 559GP.
2.Clean profit.


-+Tips+-

1.Be patience. Just because your supplies dosen’t buy instantly, dosent mean you have to buy them for max.
2.Buying supplies for max raises the item, causes to less profit.
3.Don’t sell Pie Shells at Minimum.
4.Have a 1 click bank nearby, (i.e Castlewars, Al-Kharid, )